Friday, July 26, 2013

County Fair

We finished chores as fast as we could and boogied on over to the fair grounds. It's that time of year folks! Just about ery crafter, baker, jammer, farmer, ffa-er and 4 H-er... Anyone who has an art that they work in, they were there to show off and share their efforts. Jessica and I went on a treasure hunt to find the projects that we entered to see if they won any ribbons. We saw several. ^_^ Then we oo-ed and awed over other entries that were simply jaw dropping. I wish I had a picture of a barn yard/farm applique quilt that was there; it was something that you could stare at for hours and still be amazed at the level of detail that went into the quilt. Emi and I then decided to meander on over to the animals barns to see what was over there. 
We found pigs. Lots of pigs. I'm still trying to convince the parental units that we need to grow our own bacon, but guess what is prohibited in the neighborhood covenants. Yeah, pigs... :(

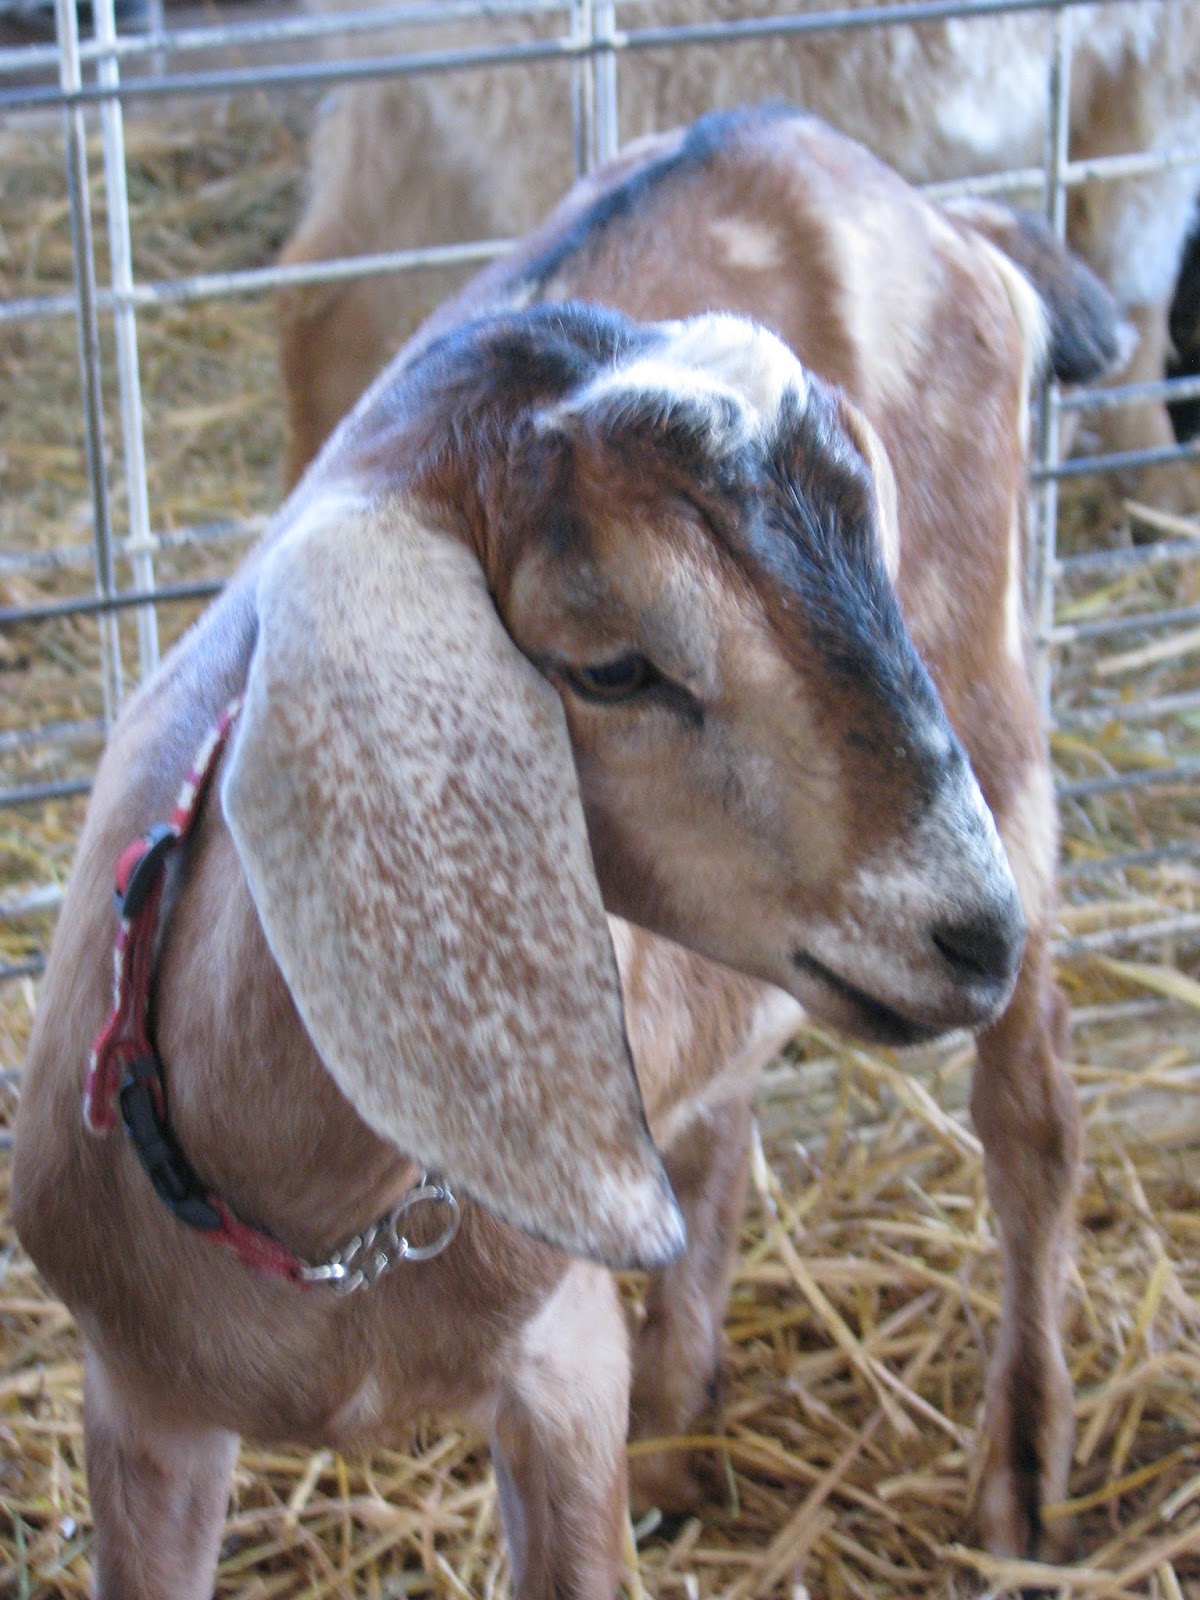
As much as I love the dwarf Nigerians, I still love those floppy eared Nubians. Except for their rather vocalized opinions. 

Pygora Goat. 

Draft horse. I think his name was Teddy. 

And then we meandered over through some of the vendor booths. I found an adorable parasol, and Eli found the police motorcycle. He got to turn on the lights. ;) 

And the police car. The officer said that Eli could also sit in the back if he wanted, but he said that he never wanted to sit in the back because, "That's were the bad guys sit."

On our way out, this bluegrass band was playing by the exit/entrance. I think they're call the Rock Bottom Boys or something like that. 

Now I want to play washboard. I never thought I'd say that in my life. ;)

Sunday, July 21, 2013

Goslings

So...umm. Yeah. I've unintentionally been keeping a secret from you. 
Emily's goose's eggs finally hatched. 
And now we have goslings. 3 to be precise. 


Tuesday, July 16, 2013

Barn Swallows

Source
Do-tee-do-ing. Nothing exciting. Just focusing on getting chores done quickly before Sunday morning church so that we're not late - again. And guess what we find clinging to the chicken wire covering the chicken brooder tanks. A baby barn swallow. We pull out the ladder, put it back up in the nest, and that's that. We didn't notice anything wrong with it, or signs that the parents had kicked it out. Yay, we saved a baby bird. Or so we thought.

Come Monday morning, I didn't even think of checking for baby bird issues, when, lo-and-behold, there's another baby swallow clinging to the chicken wire. Thank goodness it didn't fall into the brooder; I don't want to think of what those meat birds would've done to something not even a quarter of their size. So we pulled out the ladder again to put the baby back into its nest. But this time, we noticed that the nest was tipping. Quite noticeably too! After much deliberation, we decided to use some wood clamps to hold a piece of wood underneath the nest, so it wouldn't tip any farther. Who hated the renovations to the nest? The babies' parents. The flew circles around the barn, chirping loudly, and bickering about the new color scheme while sitting on the barn stall railing. Actually, they wouldn't even go near the nest to feed their brood.

Who's got a Plan 'B'? Anyone? Well, step one: remove clamp and extra wood. Little did I know when I climbed that ladder that our little system was holding up the nest. I ended up on my tippy-toes on the ladder holding up the nest while everyone else scrambled around trying to formulate the rest of plan b. Why did those birds have to build their nest on a wire, I mean really? We set the nest on a more secure ledge close to where they originally set up house, but mommy and daddy bird couldn't figure out where their nest ran off to. They kept checking this other ledge above one of the lights in the barn where they had started a nest earlier in the season (they started building 3 nests before deciding they liked the wire). So we scooted the ladder over to that ledge and carefully put the nest up and we walked away. We did all that we could. That was that. We weren't sure what we'd end up doing if they didn't find their nest.

Later, we were back in the barn, and who was making the rounds making sure that the little brood was getting their fair share of bugs? Yep, the bickering barn swallow couple. They found their nest and their brood of four.

Monday, July 15, 2013

The day is all over the shirt...

It's a hand-me-down shirt that I hadn't worn before. Somehow it wound it's way into the back of the work shirt drawer. Long story short, we fell behind on laundry, and guess what I found. Yep, it had it's debut day on the farm. I made sure that the introduction to my life was about as 'real' as it got. What was on the to-do list for the day? Disbudding and tattooing baby goats. But first...

We had an escapee turkey. She flew the coop and made a jail break. So Jake and I rounded her up and enacted the UN no-fly-zone restrictions - we clipped her wing. Somehow I ended up being the one holding the big bird, and she made her displeasure known. She snagged her domesticated poultry talons on my shirt in several places. (Since then, we've had to clip two more birds' wings - I had a better grip that time.)

Finished breakfast and it was time for disbudding. For those of you who aren't familiar with what dehorning is all about, you have a scalding hot iron that you put on the horn bud for about 25 seconds. It stinks, the kid screams, the barn fills with the pungent 'aroma' (thankfully it was breezy, so it cleared out quickly). After the nasty part of the job is done, you apply some blue/purple goo to help keep things from getting infected and what-not. Then it's all done. The kid bounces back to its mama like nothing happened. Well... one of the kiddos decided to smear the purple stuff on me before running back to mom.

But wait! There's more.

We also tattooed the little does that we're planning on selling (once the paper work is all figured out...). One person holds kid goat tight while person #2 tattoos the ear. And we needed to tattoo both ears on three doelings. :does some finger counting: That's six different tattoos. And the wonderful color that's used? Green. New color added to the shirt! While they were at it, they also rubbed the green ink over one side of my neck. It looked like some sort of monochromatic Picasso portrait; it wasn't until after I ran errands that a friend informed me that baby wipes work really well at getting that stuff off. ;) And I got some pretty hilarious expressions from people. I enjoyed myself. Time to play 'Guess that tattoo!'

When all was said and done, I looked down and realized how dirty the goats were - they had been rolling around in the dirt in the side shed.

So between the greens, purples, and dusty hues, I almost had a completely new shirt! ;)

Friday, July 5, 2013

Historical Sewing - 1860's Blue Day Dress

Several years ago, a friend and I embarked on a sewing project together - we were going to sew Civil War dresses. Neither of us had sewn something like that before (Regency dresses and medieval gowns are pretty straight forward all things considered), and we wanted the challenge of a mid-1800's gown. We both studied up on the dress construction, blah blah blah... and jumped in. 

Step 1: find pattern. We landed on Simplicity 3727. It looked straight forward enough.
Step 2: procure fabric. Nothing at Joann's was going to cut it, so we ventured to the biggest fabric store in the area. There's an acre of fabric. Slightly overwhelming. But we found a reproduction fabric section which helped a lot. ;)
Step 3: Create the correct silhouette. Yes, there are petticoats, hoops and a corset keeping everything where it's supposed to be. 
Step 4: Make dress. My friend got her dress all finished in time for the reenactment all those years ago. Mine? It was done. But uh, well... my oops was that I made the bodice to my non-corseted measurements. In other words, it was too big. ;) So in the to-do-later pile the bodice went to be overlooked by more new and exciting sewing projects (don't worry, that blue bodice had lots of friends that pile).

Emily, looking gorgeous in her 1860's ensemble

And I farbed around in what I could make-do with the time and skills that I had. And yes, I wore flip flops under all those layers. ;)

Well, after finishing my brother's coat, I got this excited giddiness about finishing the unfinished. Time for procrastination to be pushed to the back seat. Let's get stuff done. I pulled the bodice out of the bag and assessed where I had left things:

- The fringe. It looked like it was being eaten alive by golden fringe. I guess using interior decorating trims has its downside. So the lion's mane was trimmed 3 inches shorter. Proportionally, it looks much better now. 

- There was that silly sizing issue. Do you know how hard it is to get your measurements of yourself by yourself when you're wearing a corset? ;) Brought in the areas that needed it, and it fits like a glove now. No more bagginess making me feel like a giant lumpy blueberry. 

- The under sleeves needed tacking on and the cuff links needed to be made. That's pretty much self-explanatory. 

- The collar. The pattern included instructions for making your own to attach to the dress. I made it, but it didn't look... right. But I left it there. One day, my sisters and I decided to stop in an antique shop that we hadn't checked out yet. Guess what I found. Yep, a gorgeous, much more elaborate collar than I could ever make. But it didn't have a price tag. It's bartering time. I got it for $4. ^_^ And it fit the dress perfectly.

Then I took a step back. It was done. All those years of just sitting in the cupboard, and it didn't need that much work done on it. I could have been wearing it all this time! Now I just need to come up with an excuse to wear it. 
And that gap in the front? It's not there when I wear it. It's fitted for a different silhouette than what my dress form is. ;)

Random end note: In looking at those pictures from all those years ago (okay, maybe it was only 2 years ago, it feels so much longer than that), it's weird to see how much Emily and I have 'grown up.'  

Tuesday, July 2, 2013

Historical Sewing - Mid 1800's British Uniform

With much gnashing of teeth, pulling of hair, staring at it awkwardly in fear, wracking my brain over how historically 'accurate' it is going to be, taking my brother shopping with me at the fabric store, some more staring, and going back to the store... oh you get the point. It has taken me almost a year to finish this coat. My brother asked me last summer if I could make him a very specific coat (and this is coming from the guy who rarely asks for anything) - a British officer's uniform from the Zulu War. We worked out a trade, and I sorta set to work. It certainly ranks #1 hardest project I've ever done in my sewing career. I can point out all of the oops, shortcuts, the what-was-I-thinkings, and the 'that-shouldn't-have-worked-but-it-did-anyway.'  I've never done any sort of man's garment before, let alone a lined, tailored jacket! But I survived to sew another day. ^_^


The lo-down:
Pattern: McCalls 4745 (A)

Alterations:
- The pattern is originally drafted for American Civil War, not the British Zulu War. So the color is obviously different. ;)
- lapels on the shoulder drafted from one of my brother's trench coats
- gold braid and decorative buttons added to collar
- My brother has a very strong, athletic build, so, even with cutting it to his measurements, I had bring in the waist even more and put more ease into the shoulders.

Problems:
- The gathers on the sleeves weren't long enough per the instructions, so I had to spread the gathers out even farther.
- The coat tails... a living nightmare. I couldn't figure out the directions after studying it and rereading it. The pictures with the instructions hardly corresponded with what you were doing... I eventually wound up on a pattern review site and I went through everyone's suggestions on how they survived and managed to finish the coat. Those were life savers.

So the final verdict? Would I do it again? Eh... Maybe. :shrugs: Maybe if I can work up the courage to do it again. ;)
Now Jake just needs to find the hat, boots, accessories and what-not to make the whole outfit complete. Then we can get some better pictures with him all decked out in the apparel. My part of his ensemble is finished. Onward to finish the Everest of a project to-do pile.