Tuesday, March 28, 2017

Fire and Steel and Explosive Gases, Oh My!

This last term at school was a little different - my last required class was online (and boringly easy), and the other two classes had nothing to do with horticulture and were pretty much as opposite to each other as they could be: dancing and welding. 

You already know how much I love dancing, so I don't need to go into detail about that (except to say that swing dancing is my favorite thing ever). But welding... That world was (and still is) completely foreign and unlike anything I had ever done before. 

I picked up the textbook which reads more like a manual than anything else. If you want a dull horror story, you can read this. It will tell you everything that can go wrong while welding and say it in such a matter of fact way that you have to do a double-take to make sure that you read it right.

Between sparks, slag, extreme heat (to the tune of 10,000 degrees Fahrenheit), exploding concrete, scorching hot metal, equipment that costs more than my car is worth, gas that is highly combustible and at high pressures... it was all rather intense to say the least. My brain wasn't sure how to process all of that. 
This handy chart would have been useful for the first day of class. I had no idea what the instructor was talking about when he was throwing out all these acronyms in the lecture. 
Exploding concrete? Oy. 
I had to psych myself up for each class. I had already been up early for work, and then to drive across town to school for a late evening class was exhausting. Thankfully, my dad was taking the class with me. We'd stop for Chipotle on the way to class, eat dinner, then start welding. 
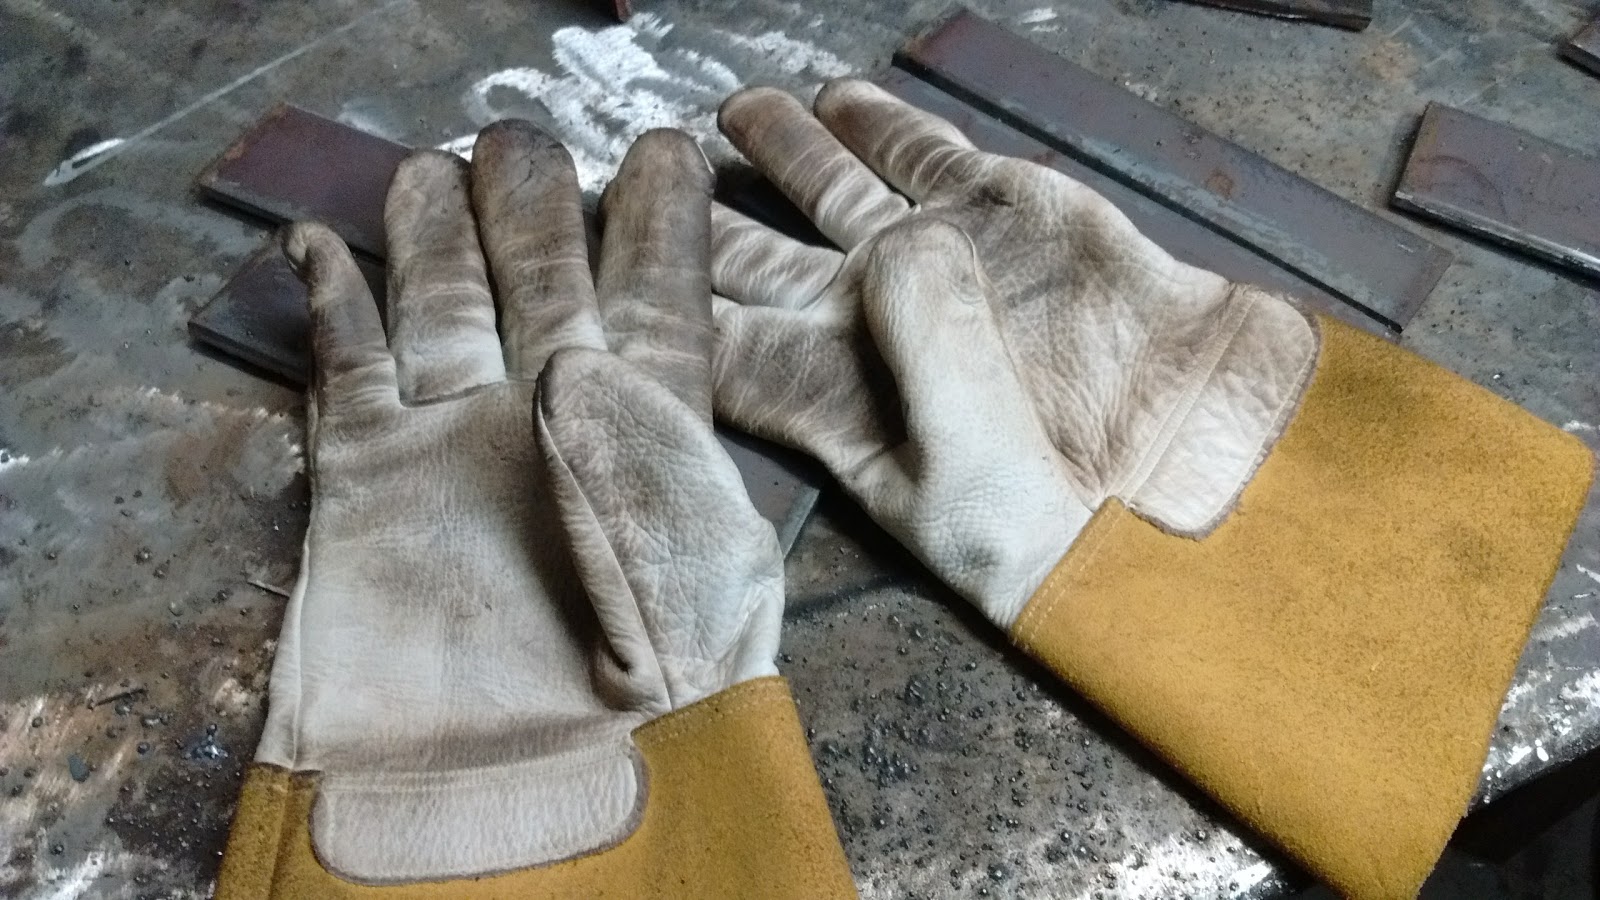
The welding booths were hot (I couldn't imagine doing this class during warmer weather), sparks were flying everywhere, you can only see through the tiny window in your helmet, picking up welding sticks with bulky gloves took some serious patience with yourself. 

At the beginning of the term, we were all handed a check-off list of the different welds that we were to work on during class. Once I got over my initial terror of holding the welding torch, things went rather smoothly, and, for me, quickly. I practically flew through the list while others were still trying to bead a straight line. My dad thinks that it's because of all my sewing that I have a steady hand. I have no idea why. 
I just want to add this before going any further: welders have quite the fashion sense. :P Heavy, rough leather jackets, hats in the strangest fabric prints, stiff canvas pants, leather boots, and you can't forget the safety glasses and welding mask. Actually, you're not even allowed in the machine shop without safety glasses on - I'm sure it's an insurance thing, but seriously, there's the possibility for heavy flying things hitting you in the head. At least protect your eyes, kid. 
We started with stick welding, then moved to wire feed, and the graduated to bigger wire feed. That's about as far as most the class got through their lists. Since I finished early, I got to play with oxyfuel welding (the chunkier cousin of TIG welding), oxyfuel torch, and a plasma torch (which was super cool because you can cut a lot of metal really fast and there's sparks everywhere, and I was covered in steel flecks). 

We had the option to do a project in class if we so desired. I had no idea what to make. So to pinterest I went. I narrowed it down to two possibilities: a necklace hanging tree or cattails for the kidney bean of a pond in my herb garden. I headed to the repurposing store to see what I could find. I honestly had no idea what I was looking for, but the owner was super helpful, and I found some steel leaves that someone had hammered out. With that, I knew that I would be doing the tree. I then wandered through the aisles of Home Depot (now I know how my dad and brother feel in the craft store) until I found metal rods. 

Because the metal rods were thin enough, I was able to cut and lay everything out at home with the tools that we have. This is what I came up with
And I used all the pieces within 45 minutes of starting. We had from 6:30-9:50 to weld. My tree looked rather poorly pruned, so the next week, I brought in more branches and leaves.
The finished result:
The log round is from a maple tree that fell on the fence during one of the storms this winter. How nice of the tree to get to a level that we can reach it. :P 

Because I finished the tree much faster than anticipated, I also figure out how to do the cattails since the instructor showed me how to use the cutting torch. My cutting lines are rather jagged, but I didn't feel inclined to smooth them out - it's just going out in the garden... 
They look like I stuck swords in the ground.Now to just figure out how to get in in a stone... Hmm... 
The class certainly felt over my head at the beginning, now I feel like I could pick up a welder and melt metal whenever I need to. I guess the class did what it was supposed to. ;) Do I feel inclined to pursue more classes in this field? Not really. It's not a world that I'm necessarily drawn to, but it is good to know how to wield a welder. 

Until next time!
SG

Tuesday, January 24, 2017

January Recap

 January could be summed up with snow and cold. It really forced us to slow down, hunker down, and wait until things thawed. Actually, it was a much needed breather even if it all was quite the hassle to do anything in 12-18" of snow: barn chores, haul water out to the animals, and taking longer to bundle up to head outside. It was frigid, but it was gorgeous. 
 Of course, Jubilee loved every moment of it. ;) 
 Through the years and as I've been outside more and more, I've found that I love all the seasons for different reasons and how they create a rhythm to life. Winter is a time of rest to brace for the hectic pace of spring, the dragging through summer, and a reprieve after the scurrying through autumn. There is always something to complain about with each season, but each season also has a beauty that the other seasons don't have. I recently discovered 'Winter Song' by Emily Smith, and the lyrics are rather fitting. It encompasses hygge (hue-gah) - embracing each season for what it is. 
"So we'll stoke the fire and light the lamp
Turn our backs in from the damp
Settle down beneath the starry sky
Endure the winter passing by"
 "With carols sung, the trees been taken down
We've passed a dram and the bells no longer sound
Snowdrops rise with promise of the spring
There's talk and wonder
At what the year might bring"
 "The blackbird starts to thicken up her nest
While the early lamb, he takes a snowy step
But the north wind's grip it tightens with his chill
And holds the buds closed against their will"
  "So we'll stoke the fire and light the lamp
Turn our backs in from the damp
Settle down beneath the starry sky
Endure the winter passing by"

Until next time!
SG

Making Chevre

This school term certainly got off to a rocky start, but now that I'm getting into the swing of things, I wanted to share some of what I've been working on. In my writing class, I've been trying to do papers on farm stuffs so that I could share it with you as well! (and get double usage out of each writing session :P). Last week's assignment was to guide someone through a procedure. I scribbled out some ideas, but they were all much more involved than a two page ordeal. Then, in the sanctum of idea generation - the shower, I thought of cheese. One, because I'm totally addicted to cheese. Two, because why not? So here you go. 

Making Your Own Cheese

To some, the thought of fermenting and culturing dairy products is daunting if not dangerous. While some cheeses are more difficult to make, many simple ‘farm house’ cheese can be made at home with just a handful of ingredients, some basic equipment, and patience. This is going to focus on chevre: a soft, goat’s milk cheese.
To get started, you will need to gather the following:
Ingredients
-          1 gallon of goat milk
-          1 packet of chevre starter cultures (resources listed below).
o    Note: If you purchase more than you are going to use for just one recipe, then you will need to put the extra packets in the freezer to put the cultures into a cold-induced stasis.
o   Another note: Different cheeses are made from different cultures, so you will want to make sure that the starter is for chevre cheese specifically.
Equipment
-          Stainless steel stockpot with lid
-          A non-reactive whisk (stainless steel or silicon are fine, plastic is not recommended)
-          A large towel
-          Candy thermometer (make sure that it is calibrated correctly!)
-          Plastic strainer large enough to hold a gallon of milk
-          Giant bowl
-          Cheese cloth (can be purchased at most health food stores, online, or homesteading stores)
To get things started, you want to make sure that your cooking equipment is sterilized. When culturing any food, you only want the beneficial bacteria to be present in the product and not harmful pathogens. You can do this by simply putting your stockpot and whisk in the dishwasher and using the ‘sterilizing’ setting. After doing this, you can put the towel into the dryer to warm it up if you want (this is not necessary unless it is chilly in the house; you will see how the towel is used later).
                Once the dishes are retrieved from the dishwasher, you put the milk into the stockpot and slowly warm it up on the stove and slowly stir it constantly. If you raise the temperature too fast, the milk will curdle. Use the thermometer to keep an eye on how warm the milk is; the goal temperature is 85-86°F. After the milk reaches the desired temperature, turn off the stove heat and add in the packet of starter cultures. Whisk gently for approximately two minutes to allow the cultures to become rehydrated and incorporated throughout the milk.
Next, place the lid on the stockpot, wrap the entire thing with the towel, and place it on a quiet corner of the counter where it will not be in the way of your other culinary activities. By wrapping the stockpot with a towel, it will keep the milk at a temperature where the cultures can be active and doing their job: fermenting the milk. Let the milk sit in its miniature sauna for 12-18 hours. The next day, you can tell if the cheese is ready by slightly tilting the stockpot to reveal the solid, fatty mass of white (curds) and a yellow fluid (whey). The longer you allow the cultures to do their work, the more strongly flavored the cheese will be. 
You have almost accomplished your cheese-making task! You just need to get the actual cheese out of its protein whey bath. To separate the two parts of the cheese, you can do this in two different ways.
1.       If you want to save the whey for another use (chickens love whey), then you strain the whey into a very large bowl. To do this, place an inverted Tupperware container inside the bowl, prop the colander on top of the Tupperware, line the strainer with cheesecloth, and then gently pour in the cheese (curds and whey).
2.       If whey is of no importance to you at the moment, you can line your giant bowl with cheesecloth, gently dump the cheese into it, pull up the sides of the cheesecloth and tie them into a knot, and hang it bag over the sink to let the liquid separate. You can hang it over the sink faucet if you would like.
Let the cheese strain for another 12 hours. The longer the cheese is allowed to hang, the drier the cheese will be. Any longer than 12 hours, the cheese will be crumbly. You can experiment by adding in different herbs and seasonings to flavor your creation if you so desire (or if the cheese even lasts that long). You can also try milk from different breeds of goats; the flavor and pungent qualities of the milk varies from breed to breed.
You now have the tools to get you started on cheese-making adventures. After getting comfortable with this process, you just might become addicted to the process as this Amazon reviewer discovered.

Resources
Starter cultures:
https://www.amazon.com/Garden-Outdoor-Chevre-C20G-5-Packets/dp/B0064OLRH6/ref=sr_1_3?ie=UTF8&qid=1484686169&sr=8-3&keywords=cheese+cultures

https://www.azurestandard.com/shop/product/real-cheese-starter-culture-chevre/19938